Download the ODFDOM library (odfdom.jar) and the Apache Xerces parser. Put these files in a directory somewhere, say, called odfdomlibs.
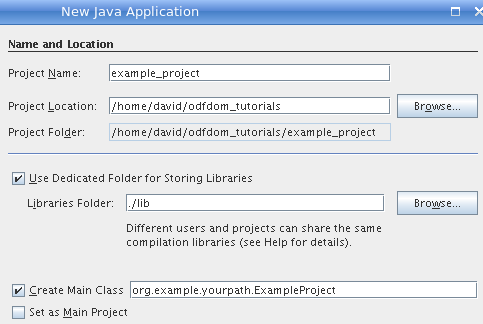
In NetBeans, create a new project with the type Java Application, and set it up as shown in the following screenshot:
Right-click the project name in the project panel, and select . In the subsequent dialog, choose from the panel on the left, then click .
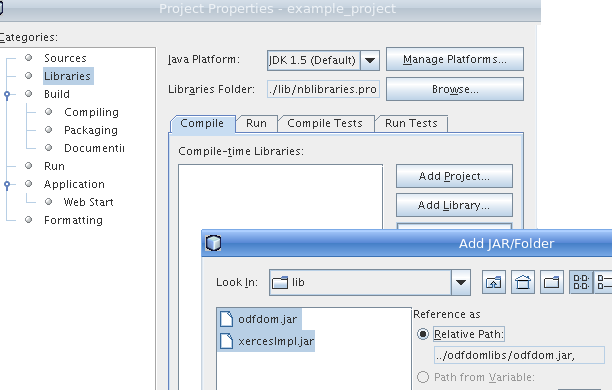
In this instance, we have added the files as a relative pathname. If you are going to create multiple ODFDOM projects, this choice or absolute path name is probably your best choice. If you use , then each project will have a separate copy of the libraries. Since, at the time of this writing, the library is under development, you probably do not want to have to update the library in each of your projects.
That’s all there is to it. You are now ready to start working with the ODFDOM API.