One of the wonderful features of GIMP is that it all its functionality may be accessed through scripting. So far most of the script programming for Gimp has been done through Scheme through Script-Fu. Unfortunately the Scheme environment Gimp provides is very primitive, e.g. without any reasonable error handling. Furthermore, must users are not familiar with scheme as a language. Some users may therefore prefer to write scripts for the Gimp in Perl.Perl as a language is probably more familiar to the web-literate users, as it is the major language for writing CGI scripts. Now, Gimp scripts may also be written with Perl. This tutorial will describe how to write such plug-ins and scripts for Gimp.
As there are several excellent tutorial texts describing the perl language, this tutorial will assume at working knowledge of Perl, and will instead concentrate on the use GIMP together with the of the perl modules Gimp and Gimp::Fu, written by Marc Lehmann, pcg@goof.com.
The Perl::Gimp tutorial scripts have been tested with the following versions:Perl and all its associated modules are available in source form from the Perl Comprehensive Archive network, CPAN. It is also possible to download them in RPM format from the ftp.gimp.org website.
- Gimp version 1.2 or later, with all its prerequisites.
- Perl version 5.005 or later.
- The perl module Gtk, version 0.7003
- The Gimp module, version 1.201 or later
Most scripts make use of the simplified interface Gimp::Fu provided with the Gimp module. Gimp::Fu provides a framework for entering parameters to the script in a frame like interface, just like Script-Fu, but also allows running of the script in batch mode from the command line. This tutorial will go into detail descriptions of the construction of a Gimp::Fu script, but before we do this, here is the general framework of a Perl-Fu script.
basic 1: #!/usr/local/bin/perl 2: 3: use Gimp ":auto"; 4: use Gimp::Fu; 5: 6: # Register extension to gimp 7: register ... ; 8: 9: exit main(); # Handle over control to gimp
The interesting items to note in the script is the use of the two modules Gimp and Gimp::Fu, the register function, which will be described in detail below, and the way the control is handed over to Gimp module on line 9. The use of the ":auto" statement makes perl automatically include all of the gimp PDB functions and constants into the perl name space.
Before going into the details of the Perl-Fu script, we will describe how to access the various the functionality of GIMP. All functions known to GIMP are available through the procedural database (PDB). All the PDB functions may be called from perl, as will be seen below. These PDB functions are either internal to gimp, or have been made available through a plug-in or a script extension, but as far as the caller is concerned there is no difference. As we will see below, when a perl function is registered through the register function, it will appear in the PDB as well.Gimp/perl comes with a PDB browser available in Xtns>PDB Explorer. (There is another PDB browser available in Xtns>DB Browser but the PDB Explorer is more suited for Perl users.) This browser provides a way of seeing all the functions in the PDB, as well as their input and output parameters. E.g. the PDB Explorer entry for gimp_image_new, which will be used in the example below looks like this:
All the the constants mentioned in the PDB Explorer have been defined within Gimp::Fu and may be used within perl. E.g. I.e. a call to create a new image of size 100x150 of type RGB looks as follows:
Name: gimp_image_new Blurb: Creates a new Image with the specified with, height, and type In: INT32 width The width of the image INT32 height The height of the image INT32 type The type of image { RGB (0), GRAY (1), INDEXED (2) Out: IMAGE image The ID of the newly created image Help: Creates a new image, undisplayed with the specified extents and type. A layer should be created and added before this image is displayed, or subsequent calls to 'gimp_display_new' with this image as an argument will fail. Layers can be created using the 'gimp_layer_new' commands. They can be added to an image using the 'gimp_image_add_layer' command $img = gimp_image_new(100, 150, RGB)The PDB entry above shows that gimp_image_new is called with three parameters width, height, type. These are all of type INT32. This type and other types will be explained below.Script-Fu scripts are called just like any other script according to the PDB signature in the PDB browser. E.g. to run the Script Fu basic one logo just do:
script_fu_basic1_logo("Hello", 72, "-*-utopia-*-r-*-*-72-*-*-*-*-*-*-*", [0,0,0],[1,1,1]);Unfortunately, as of the writing, calling Script Fu from perl has proved a to make both ScriptFu and gimp very unstable and caused both of them to crash. If any of the readers is able to describe what is needed to get it to run successfully, I will happily include this in a future version of this tutorial.
Note!
When calling a PDB function from Perl::Gimp that has an image and a drawable as the two first arguments, only the drawable should be given as argument in the calling sequence.
Gimp-Fu is perl's answer to Script-Fu. It provides a simplified method for accepting parameters for a script through a Gtk interface, just like script-fu, but as we shall see below, it has some additional bells and whistles.The main function for a Gimp-Fu script is the register function. This function declares the interface of the script to gimp. The register function takes the following 10 parameters, that must all be provided:
- The name of the function - a string. This is the name of the function as it will be known in the PDB.
- A small description - a string
- A help text - a string
- The authors name - a string
- The copyright of the script - a string
- Creation date - a string
- Menu path - a string. The path has one of the two forms:
If form 1. is given, then the script is a standalone script that appears in the menu hierarchy under Xtns/Perl-Fu and takes all its inputs through the Gimp::Fu interface frame. If form 2. is given on the other hand, then the script is tied to the image menu popped up through the right hand button over any image. In this case Gimp::Fu will add as the first two parameters to the script the image and the drawable active when the script was invoked.
- "<Toolbox>/Xtns/Perl-Fu/Script Name"
- "<Image>/Perl-Fu/Script Name"
- The acceptable image types - a string. This list contains a list of image types acceptable. This field is only used for scripts that are in the "<Image>" hieararchy. Possible values are listed in the table below:
value meaning * Any images are accepted RGB RGB images RGBA RGB images with alpha channels GREY Grey level images
- Parameters - A reference to an array of parameters. (A reference to an array in perl is simply an array written within square brackets). Each parameter in turn is a reference to an array containg the following four or five values:
- The type of the parameter. The types recognized by Gimp::Fu and their perl are given in the following table:
Type Possible forms Comment PF_INT
PF_INT32
PF_INT16
PF_INT842 A number. PF_INT is a synonym to PF_INT32. PF_VALUE
PF_FLOAT3.141 A floating point number. PF_TOGGLE
PF_BOOLEAN0
1A boolean value. PF_SLIDER
PF_SPINNERAn integer value through a slider and a spinner interface. The range parameter should be specified and is interpreted as minimum, maximum, and step, e.g. [0,100,1]. ![]()
PF_FONT -*-blippo-*-*-*-*-24-*-*-*-*-*-*-* A font in X11 font format. This interface launches a font browser. PF_STRING "A string" A string PF_COLOR
PF_COLOUR[255,127,0]
#ff7f00A color may either be expressed as a reference to an array of three components, or as a hexadecimal triple, proceeded by the hash sign. PF_TOGGLE 0
1A boolean toggle PF_IMAGE - An image PF_DRAWABLE - A drawable. PF_BRUSH A brush PF_GRADIENT A gradient PF_PATTERN A pattern - The name of the parameter - a string
- A help text for the parameter
- Default value for the parameter. This should be given in the form listed in the table above.
- An array defining allowed range for the value. This is only possible for PF_SLIDER and PF_SPINNER.
- A reference to an array of return types of the sub in the 11th parameter.
- The sub to be called - a reference to a sub . This subroutine will be called when the associated menu entry declared through the Menu path described above. When the sub is called it is passed as arguments the list of parameters declared in field 9, declared above, and in the case of a "<Image>..." script, the active image and layer as first and second parameters.
A reference to a sub in perl may be declared in two ways. Either by declaring a subroutine at a different place in the source file, e.g. sub run and reference it by writing \&run. An alternative way is to write it inline by simply writing:
sub { ($text, $color) = @_ ; ... }The sub is expected not need to display a new image after it has created it. Instead it is expected to return the new image or images that were created in accordance with the return types declared in parameter 10 of the register call described above. This behaviour has been added in order to be able to call the sub noninteractively. More about that behaviour below.
The following Gimp::Fu script example shows the steps described in the previous section. It registeres a script that takes two values, the size of the image and a color, and then produces an image of the requested size with the requested color. Quite useless, but is shows the importent steps of how to register a script, how to create a new image, and how to access some PDB functions.
uni 1: #!/usr/local/bin/perl -w 2: 3: use Gimp ":auto"; 4: use Gimp::Fu; 5: 6: sub img_uni { 7: my ($size, $color) = @_; 8: 9: # Create a new image 10: $img = gimp_image_new($size, $size, RGB); 11: 12: # Create a new layer 13: $layer = gimp_layer_new($img, $size, $size, RGB, 14: "Layer 1", 100, NORMAL_MODE); 15: 16: # add the layer to the image 17: gimp_image_add_layer($img, $layer, -1); 18: 19: # Set the background to the required color 20: gimp_palette_set_background($color); 21: 22: # Paint the layer 23: gimp_edit_fill($layer, BG_IMAGE_FILL); 24: 25: # Return the image 26: return $img; 27: } 28: 29: register 30: "img_uni", # fill in name 31: "Create a uniform image", # a small description 32: "A tutorial script", # a help text 33: "Dov Grobgeld", # Your name 34: "Dov Grobgeld (c)", # Your copyright 35: "1999-05-14", # Date 36: "<Toolbox>/Xtns/Perl-Fu/Tutorial/Img Uni", # menu path 37: "*", # Image types 38: [ 39: [PF_INT, "size", "Img size", 100], 40: [PF_COLOR, "color", "Img color", [255,127,0]] 41: ], 42: \&img_uni; 43: 44: exit main();
Most of these commands are directly copied out the PDB.This script shows the essential steps of producing a stand-alone script:
To test the script, save it in the directory $HOME/.gimp-1.2/plug-ins. It must then be made executable through the command:
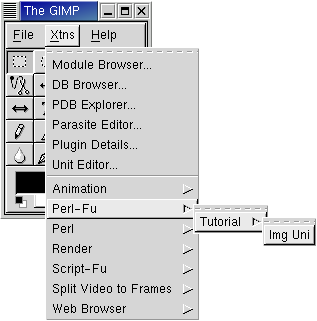
line(s) Description 10 Creating a new image. 13-14 Creating one or more layers. 17 Attaching the layer to the image. 19-23 Do some painting operations in the layers. 26 Return the image to the caller 29-42 Registration of the extension chmod +x $HOME/.gimp-1.2/plug-ins/uniThen start gimp. It is generally a good idea to test the syntax of the script with perl -c before starting gimp. (A more official way to add scripts is to use the gimptool --install-bin command).Note: Due to a bug in gimp (verified for version 1.2) it is not possible to add scripts once gimp is running. On the other hand, it is possible to change a script which has already been registered, as long as the parameters don't change.
The script is now accessible through the menu system through the Xtns top menu:
![]()
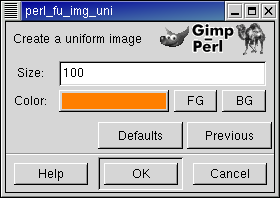
When choosing this menu entry the following screen is popped up:
![]()
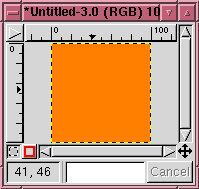
Choosing the default values result in the image:
![]()
Gimp::Fu provides an alternative object-oriented syntax for the image and the drawable commands. Here is a table showing the procedural vs the object oriented syntax for a few commands:
procedural syntax object oriented syntax gimp_image_add_layer($drw,-1); $img->add_layer($drw, -1); gimp_drawable_width($drw); $drw->width(); The substitution rule for converting a PDB turning into a method is as simple as erasing ``gimp_image_'' from the beginning of the function call and calling this method through the image object. Similarly for the gimp_drawable_... functions.
Note that the object oriented syntax is only syntactic sugar that makes the calling syntax cleaner in some cases. The error messages are still given in the procedural format.
In the uni script the function gimp_edit_fill was called to fill the whole image. Looking at the info for gimp_edit_fill in the DB browser we find the following:
Name: gimp_edit_fill Blurb: Fill selected area of drawable In: DRAWABLE drawable The drawable to fill from INT32 fill_type The type of fill: FG_IMAGE_FILL (0), BG_IMAGE_FILL (1), WHITE_IMAGE_FILL (2), TRANS_IMAGE_FILL (3), NO_IMAGE_FILL (4) Help: This procedure fills the specified drawable with the fill mode. If the fill mode is foreground, the current foreground color is used. If the fill mode is background, the current background color is used. Other fill modes should not be used. This procedure only affects regions within a selection if there is a selection active. Thus, if a selection is active when gimp_edit_fill is called only the selection is painted. There are lots of ways of choosing a selection as can be seen when searching for a ``select'' in the PDB. The example below uses gimp_rect_select, whose entry in the PDB looks as follows:
A simple use of this function which selects a rectangle in the middle of an image and paints that rectangle with a user defined color. This example also introduces a couple of new features we haven't seen before:
Name: gimp_rect_select Blurb: Create a rectangular selection over the specified image In: IMAGE image The image FLOAT x x coordinate of upper-left corner of rectangle FLOAT y y coordinate of upper-left corner of rectangle FLOAT width the width of the rectangle: width > 0 FLOAT height the height of the rectangle: width > 0 INT32 operation the selection operation: {ADD (0), SUB(1), REPLACE (2), INTERSECT (3) } INT32 feather feather option for selections FLOAT feather_radius radius for feather operation Help: This tool creates a rectangular selection over the specified image. The rectangular region can be either added to, subtracted from, or replace the contents of the previous selection mask. If the feather option is enabled, the resulting selection is blurred before combining. The blur is a gaussian blur with the specified feather radius.
- The script is associated with an image since its menu path starts with "<Image>/...". Note that as a result of this the callback sub in line 13 receives two additional parameters, the active image and the seleced drawable.
- The use of a subroutine without a name as a parameter to register
- The use of the PDB functions gimp_undo_push_group_start and gimp_undo_push_group_end. These functions declare an undo group. When an undo is done on the image, instead of having the individual operators undo, all the actions between the undo start and the undo group calls will be undone at once.
- The return type of the register function defines what new images should be displayed by gimp. In this case we don't want to display any new images and therefore return an empty array.
paint-select 1: #!/usr/local/bin/perl -w 2: 3: use Gimp ":auto"; 4: use Gimp::Fu; 5: 6: register 7: "img_paint_select", 8: "Paints the selection", "Paints the selection", 9: "Dov Grobgeld", "Dov Grobgeld", "1999-05-14", 10: "<Image>/Perl-Fu/Tutorial/Paint Select", 11: "*", 12: [ 13: [PF_COLOR, "color", "Rectangle color", [0,0,255]] ], 14: sub { 15: my($img, $layer, $color) = @_; 16: my($width, $height) = (gimp_image_width($img), 17: gimp_image_height($img)); 18: 19: # Select a rectangle inside the image and paint it with color 20: gimp_undo_push_group_start($img); 21: gimp_rect_select($img, 22: $width/4, $height/4, $width/2, $height/2, 23: REPLACE, 0,0); 24: gimp_palette_set_background($color); 25: gimp_edit_fill($layer, BG_IMAGE_FILL); 26: gimp_selection_none($img); 27: gimp_displays_flush(); 28: gimp_undo_push_group_end($img); 29: 30: # Tell gimp not to display a new image 31: return (); 32: }; 33: 34: exit main();
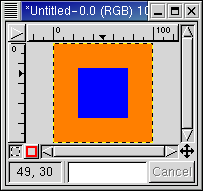
The result when run on our previous image:![]()
Besides rectangular selections elliptical selections may also be created through the PDB functions gimp_ellipse_select() and gimp_free_select() which allows the selection of ellipses and polygons.More complex selections may be created through the channel mechanism. The PDB gimp_channel_new() creates a new channel. The channel is a drawable that may be painted into, just like any other drawable, but with the difference that it is always a grey level image. Once the channel is finished, the channel may be loaded into the selection through the PDB function gimp_selection_load().
Search for ``select'' in the DB Browser to see a list of all the selection related functions.
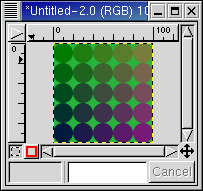
In perl it is trivial to write loops that together with the various selecton tools gives powerful creative possibilities. Here is an example that mixes colors in circles. There is nothing really new here, but it shows the power of the what we have described above.
circles 1: #!/usr/local/bin/perl 2: 3: use Gimp ":auto"; 4: use Gimp::Fu; 5: 6: sub circles { 7: my ($size, $bgcolor, $radius) = @_; 8: 9: # Create the background 10: $img = gimp_image_new($size, $size, RGB); 11: $layer = gimp_layer_new($img, $size, $size, RGB, 12: "Layer 1", 100, NORMAL_MODE); 13: gimp_image_add_layer($layer, -1); 14: gimp_palette_set_background($bgcolor); 15: gimp_edit_fill($layer, BG_IMAGE_FILL); 16: 17: my $ncircles = int($size/$radius/2); 18: 19: for ($i=0; $i<$ncircles; $i++) { 20: for ($j=0; $j<$ncircles; $j++) { 21: # Be creative and mix colors 22: $color = [$i*30, ($ncircles-$j)*25, ($i+$j)*15]; 23: 24: # Select a circle 25: gimp_ellipse_select($img, 26: $i*$radius*2, $j*$radius*2, 27: $radius*2, $radius*2, 28: REPLACE, 1, 0, 0); 29: 30: # Paint the color in the circle 31: gimp_palette_set_background($color); 32: gimp_edit_fill($layer, BG_IMAGE_FILL); 33: gimp_selection_none($img); 34: } 35: } 36: 37: return $img; 38: } 39: 40: # register the script 41: register "circles", "a loop", "a loop", "Dov", "Dov", "1999-05-14", 42: "<Toolbox>/Xtns/Perl-Fu/Tutorial/Circles", 43: "*", 44: [ 45: [PF_INT32, "size", "Img size", 100], 46: [PF_COLOR, "bg", "Background color", [40,180,60]], 47: [PF_INT32, "radius", "Circle radius", 10] 48: ], 49: \&circles; 50: 51: exit main();
The result:![]()
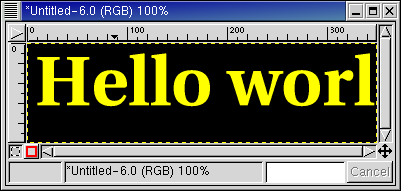
To create text the PDB function gimp_text_fontname() may be used. In this function the font is specified in the X11 font conventions. (There are also some older functions, gimp_text and gimp_text_ext in which the different X11 fields are specified explicitely.)Here is an example of a script that creates an image containing "Hello world".
hello-world1 1: #!/usr/local/bin/perl 2: 3: use Gimp ":auto"; 4: use Gimp::Fu; 5: 6: sub text1 { 7: my($font, $text) = @_; 8: 9: # Create a new image 10: $img = gimp_image_new(350, 100, RGB); 11: 12: # Create a new layer and draw it to the image at the top 13: $drw = gimp_layer_new($img, $img->width, $img->height, 14: RGB, "BG", 100, NORMAL_MODE); 15: $drw->add_layer(-1); 16: gimp_palette_set_background("black"); 17: gimp_edit_fill($drw, BG_IMAGE_FILL); 18: 19: 20: # Choose color of text 21: gimp_palette_set_foreground([255,255,0]); 22: 23: # Create the text 24: my $border = 10; 25: my $text_layer = gimp_text_fontname($drw, 0, 0, $text, 26: $border, 1, 27: xlfd_size($font), $font); 28: gimp_floating_sel_anchor($text_layer); 29: 30: return $img; 31: } 32: 33: # register the script 34: register "hello_world1", "basic text", "basic text", "Dov", "Dov", 35: "1999-05-14", 36: "<Toolbox>/Xtns/Perl-Fu/Tutorial/Basic text 1", 37: "*", 38: [ 39: [PF_FONT, "font", "font", "-*-utopia-bold-r-*-*-70-*-*-*-*-*-*-*"], 40: [PF_STRING, "text", "text", "Hello world!"] 41: ], 42: \&text1; 43: 44: # Handle over control to gimp 45: exit main();
The result:The script makes use of the function xlfd_size which extracts the size of the font from the X11 font name. This is necessary as the authors of gimp_text_fontname decided that the font size within the fontname is ignored. ![]()
One thing to note in this script is that the text that is created on line 24 is a floating layer, than needs to be anchored to its parent layer. This is done in line 27 through the call to gimp_floating_sel_anchor().
This script suffers from the problem that the image size is unrelated to the text size. This is taken care of in the following more complex example which shows the basic steps for a logo generating script.
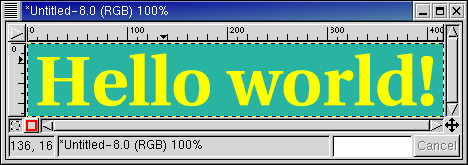
The result is an image composed of two layers; a transparent text layer on top of a uniform background.
- Creation of an image arbitrary size
- Creation of a background drawable of an arbitrary size
- Creation of text layer which exactly fits the text with the command gimp_text_fontname().
- Resizing the image and the background to the size of the text layer.
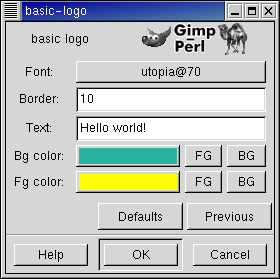
basic-logo 1: #!/usr/local/bin/perl 2: 3: use Gimp ":auto"; 4: use Gimp::Fu; 5: 6: sub basic_logo { 7: my($font, $border, $text, $bgcolor, $fgcolor) = @_; 8: 9: # Create a new image of an arbitrary size with 10: $img = gimp_image_new(100, 100, RGB); 11: 12: # Create a new layer for the background of arbitrary size, and 13: # add it to the image 14: my $background = gimp_layer_new($img, 100, 100, 15: RGB, "Background", 100, 16: NORMAL_MODE); 17: gimp_image_add_layer($background, 1); 18: 19: # Choose color of text 20: gimp_palette_set_foreground($fgcolor); 21: 22: # Create the text layer. Using -1 as the drawable creates a new layer. 23: my $text_layer = gimp_text_fontname($img, -1, 0, 0, $text, 24: $border, 1, xlfd_size($font), $font); 25: 26: # Get size of the text drawable and resize the image and the 27: # background layer to this size. 28: my($width, $height) = ($text_layer->width, $text_layer->height); 29: gimp_image_resize($img, $width, $height, 0, 0); 30: gimp_layer_resize($background, $width, $height, 0, 0); 31: 32: # Fill the background layer now when it has the right size. 33: gimp_palette_set_background($bgcolor); 34: gimp_edit_fill($background, BG_IMAGE_FILL); 35: 36: return $img; 37: } 38: 39: # register the script 40: register "basic_logo", "basic logo", "basic logo", 41: "Dov Grobgeld", "Dov Grobgeld", 42: "1999-06-09", 43: "<Toolbox>/Xtns/Perl-Fu/Tutorial/Basic Logo", 44: "*", 45: [ 46: [PF_FONT, "font", "font", "-*-utopia-bold-r-*-*-70-*-*-*-*-*-*-*"], 47: [PF_INT, "border", "border", "10"], 48: [PF_STRING, "text", "text", "Hello world!"], 49: [PF_COLOR, "bg_color", "Background color", [40,180,160]], 50: [PF_COLOR, "fg_color", "Background color", [255,255,0]], 51: ], 52: \&basic_logo; 53: 54: # Handle over control to gimp 55: exit main();
Note the special syntax of gimp_image_text_fontname() in line 23 in basic-logo with an image specified for a first parameter, and the drawable = -1. This is in contradiction to the rule above that the image should not be specified for PDB functions that take both an image and a drawable as the first two parameters. But since the drawable=-1, which has no image related to it, an image explicitely be provided. The special case drawable=-1 means that instead of creating a floating layer, a new image layer will be created.
The result shown in the following dialog and the resulting image:
![]()
![]()
When a region has been selected through one of the selection routines the area outlined by the selection may be copied to the cut-buffer through the gimp_edit_copy command. The cut-buffer may subsequently be pasted into a different layer through the gimp_edit_paste command. When a layer is pasted it becomes a floating selection. This floating selection may be moved to its required position by the command gimp_layer_set_offsets, and finally it is pasted by the gimp_floating_sel_anchor command. Another way of determining the position of a pasted layer is to create a selection in the target image before the cut-buffer is pasted.This is illustrated in the following program, which works on one image and takes as a parameter an another image, which it concatinates to the right of the first image. The lines 28-38 shows how the second image is copied and glued into the first image.
horiz-cat 1: #!/usr/local/bin/perl 2: 3: use Gimp qw( :auto ); 4: use Gimp::Fu; 5: 6: sub horiz_cat { 7: my($img1, $drw1, $drw2) = @_; 8: 9: # Get image 2 10: $img1 = $drw1->image(); 11: 12: my $img2 = gimp_drawable_image($drw2); 13: my($w1, $h1) = ($drw1->width, $drw1->height); 14: my($w2, $h2) = ($drw2->width, $drw2->height); 15: 16: # The new height is the maximum height of the images 17: my $hmax = $h1 > $h2 ? $h1 : $h2; 18: 19: # Create an undo group 20: gimp_undo_push_group_start($img1); 21: 22: # Resize the drawable layer to make room for the img 23: gimp_image_resize($img1, $w1+$w2, $hmax, 0, ($hmax-$h1)/2); 24: gimp_layer_resize($drw1, $w1+$w2, $hmax, 0, ($hmax-$h1)/2); 25: 26: # Copy $drawable2 and paste it into the new space of $drawable1 27: # select all of img2 28: $img2->selection_all(); 29: $drw2->edit_copy(); 30: 31: # make a selection in img 1 where $drw2 is to be pasted 32: gimp_rect_select($img1, $w1, ($hmax-$h2)/2, $w2, $h2, 0,0,0); 33: 34: # paste and then anchor it 35: my $floating_layer = gimp_edit_paste($drw1, 0); 36: gimp_floating_sel_anchor($floating_layer); 37: 38: # Close the undo group 39: gimp_undo_push_group_end($img1); 40: 41: # Update the display 42: gimp_displays_flush(); 43: 44: return undef; 45: } 46: 47: # register the script 48: register "horiz_cat", "Horizontal concat", "Horizontal Concat", 49: "Dov Grobgeld", "Dov Grobgeld", "2003-05-04", 50: "<Image>/Perl-Fu/Tutorial/Horizontal Concat", 51: "*", 52: [[PF_DRAWABLE, "drawable", "Drawable to concatinate", undef]], 53: \&horiz_cat; 54: 55: exit main();
So far the scripts have all been started from the menu structure within menu. But there is another possibility and that is to run the scripts from the command line, as a normal perl program. When run this way the script tries to connect to the Perl-Server, and if it fails it will launch gimp on its own. If you plan to run several scripts this way, it is obviously much faster to run the Perl-Server since launching gimp takes quite a bit of time. The perl-server may be started from the Xtns menu.When a perl-fu script is run from the command line, the result is the same as when it is run through the menus, except of the fact that it may be run with the --output parameter in case it will save the result to a file instead of displaying it within gimp. This is great for batch creation of logos, etc.
The filename for the --output has some special magic that allows to set some special image saving parameters, like interlace, quality factor, etc. See the Gimp::Fu man page for details. Note that the normal rules about image and file types are still valid, thus e.g. in order to save an image as a gif file, it must be converted from RGB to an indexed script. Currently this functionality must be included in each script, but it is possible that a future version of Gimp::Fu, includes this conversion as an option.
Here are two invocations of the scripts declared above, but with output written to a jpg file and a png file. As we said above, we can't save them as gif as the scripts do not index the images.
perl-gimp-from-shell 1: uni -o /tmp/uni.ppm -size 100 -color "#5050ff" 2: basic-logo -font '-*-utopia-*-r-*-*-100-*-*-*-*-*-*-*' 3: -o /tmp/bl.ppm -text "Perl rules"
Note that due to a bug in my version of Gimp/Perl I was not able to output images in any format but in ppm and gif. Your milage may vary. Another importent use of this interface is that it enables running the perl debugger on the perl-fu scripts.Note: The image is saved to the directory where gimp was started from and not to the directory in which the scripts were invoked, unless a complete path is given!
When using the perl-server it is not necessary to use Gimp::Fu and the register function. Instead a sub named on_net may be declared, which points to a routine that will be called when gimp starts.For a simple but powerful example of the use of the Gimp without Fu, here is a an interactive perl gimp shell that may be run from the command line:
pg-shell 1: #!/usr/local/bin/perl 2: ###################################################################### 3: # An interactive command line shell to gimp. 4: ###################################################################### 5: use Gimp ":auto"; 6: use Term::ReadLine; 7: 8: sub interact { 9: $term = new Term::ReadLine("Gimp"); 10: while( defined ($_ = $term->readline("Gimp> "))) { 11: $res = eval($_) . "\n"; 12: print("Error: $@"), next if $@; 13: print "\n"; 14: gimp_displays_flush(); 15: } 16: } 17: 18: Gimp::on_net(\&interact); 19: 20: exit main(); 21:
Here is an example of an interactive session with this shell:
interact 1: Gimp> $img = gimp_image_new(100,100,RGB) 2: Gimp> $drw = $img->layer_new(100,100,RGB_IMAGE, "bg", 100, NORMAL_MODE) 3: Gimp> $img->add_layer($drw,-1) 4: Gimp> $img->display_new 5: Gimp> $drw->edit_clear 6: Gimp> gimp_displays_flush()
This tutorial has covered only a small part of the possibilities available to a script writer. In particular the following issues available to Gimp::Perl scripts have not been covered:
- The possibility of writing customized Gtk interfaces.
- Writing fullfledged plug-ins that manipulate the tile data through the Perl Data Language (PDL) module.
- Using Perl::Gimp in a CGI environment.
- How to fill with gradients in a plugin
- How to do "free selections".